GBSB Linen Jacket
This was my entry for Round 2 of The Pattern Review Sewing Bee- which was buttonholes! Yes, you heard right, Buttonholes! I have to admit when I read “buttonholes”, I was a little confused. I was wondering how I can make buttonholes interesting. Then my husband suggested making the buttonholes in a different color thread. That sounded like a good idea, but I knew I needed to do more than just that. However, I didn’t know what to do and how to make buttonholes the focus, so this was going to be a challenge - to say the least.
The Technique
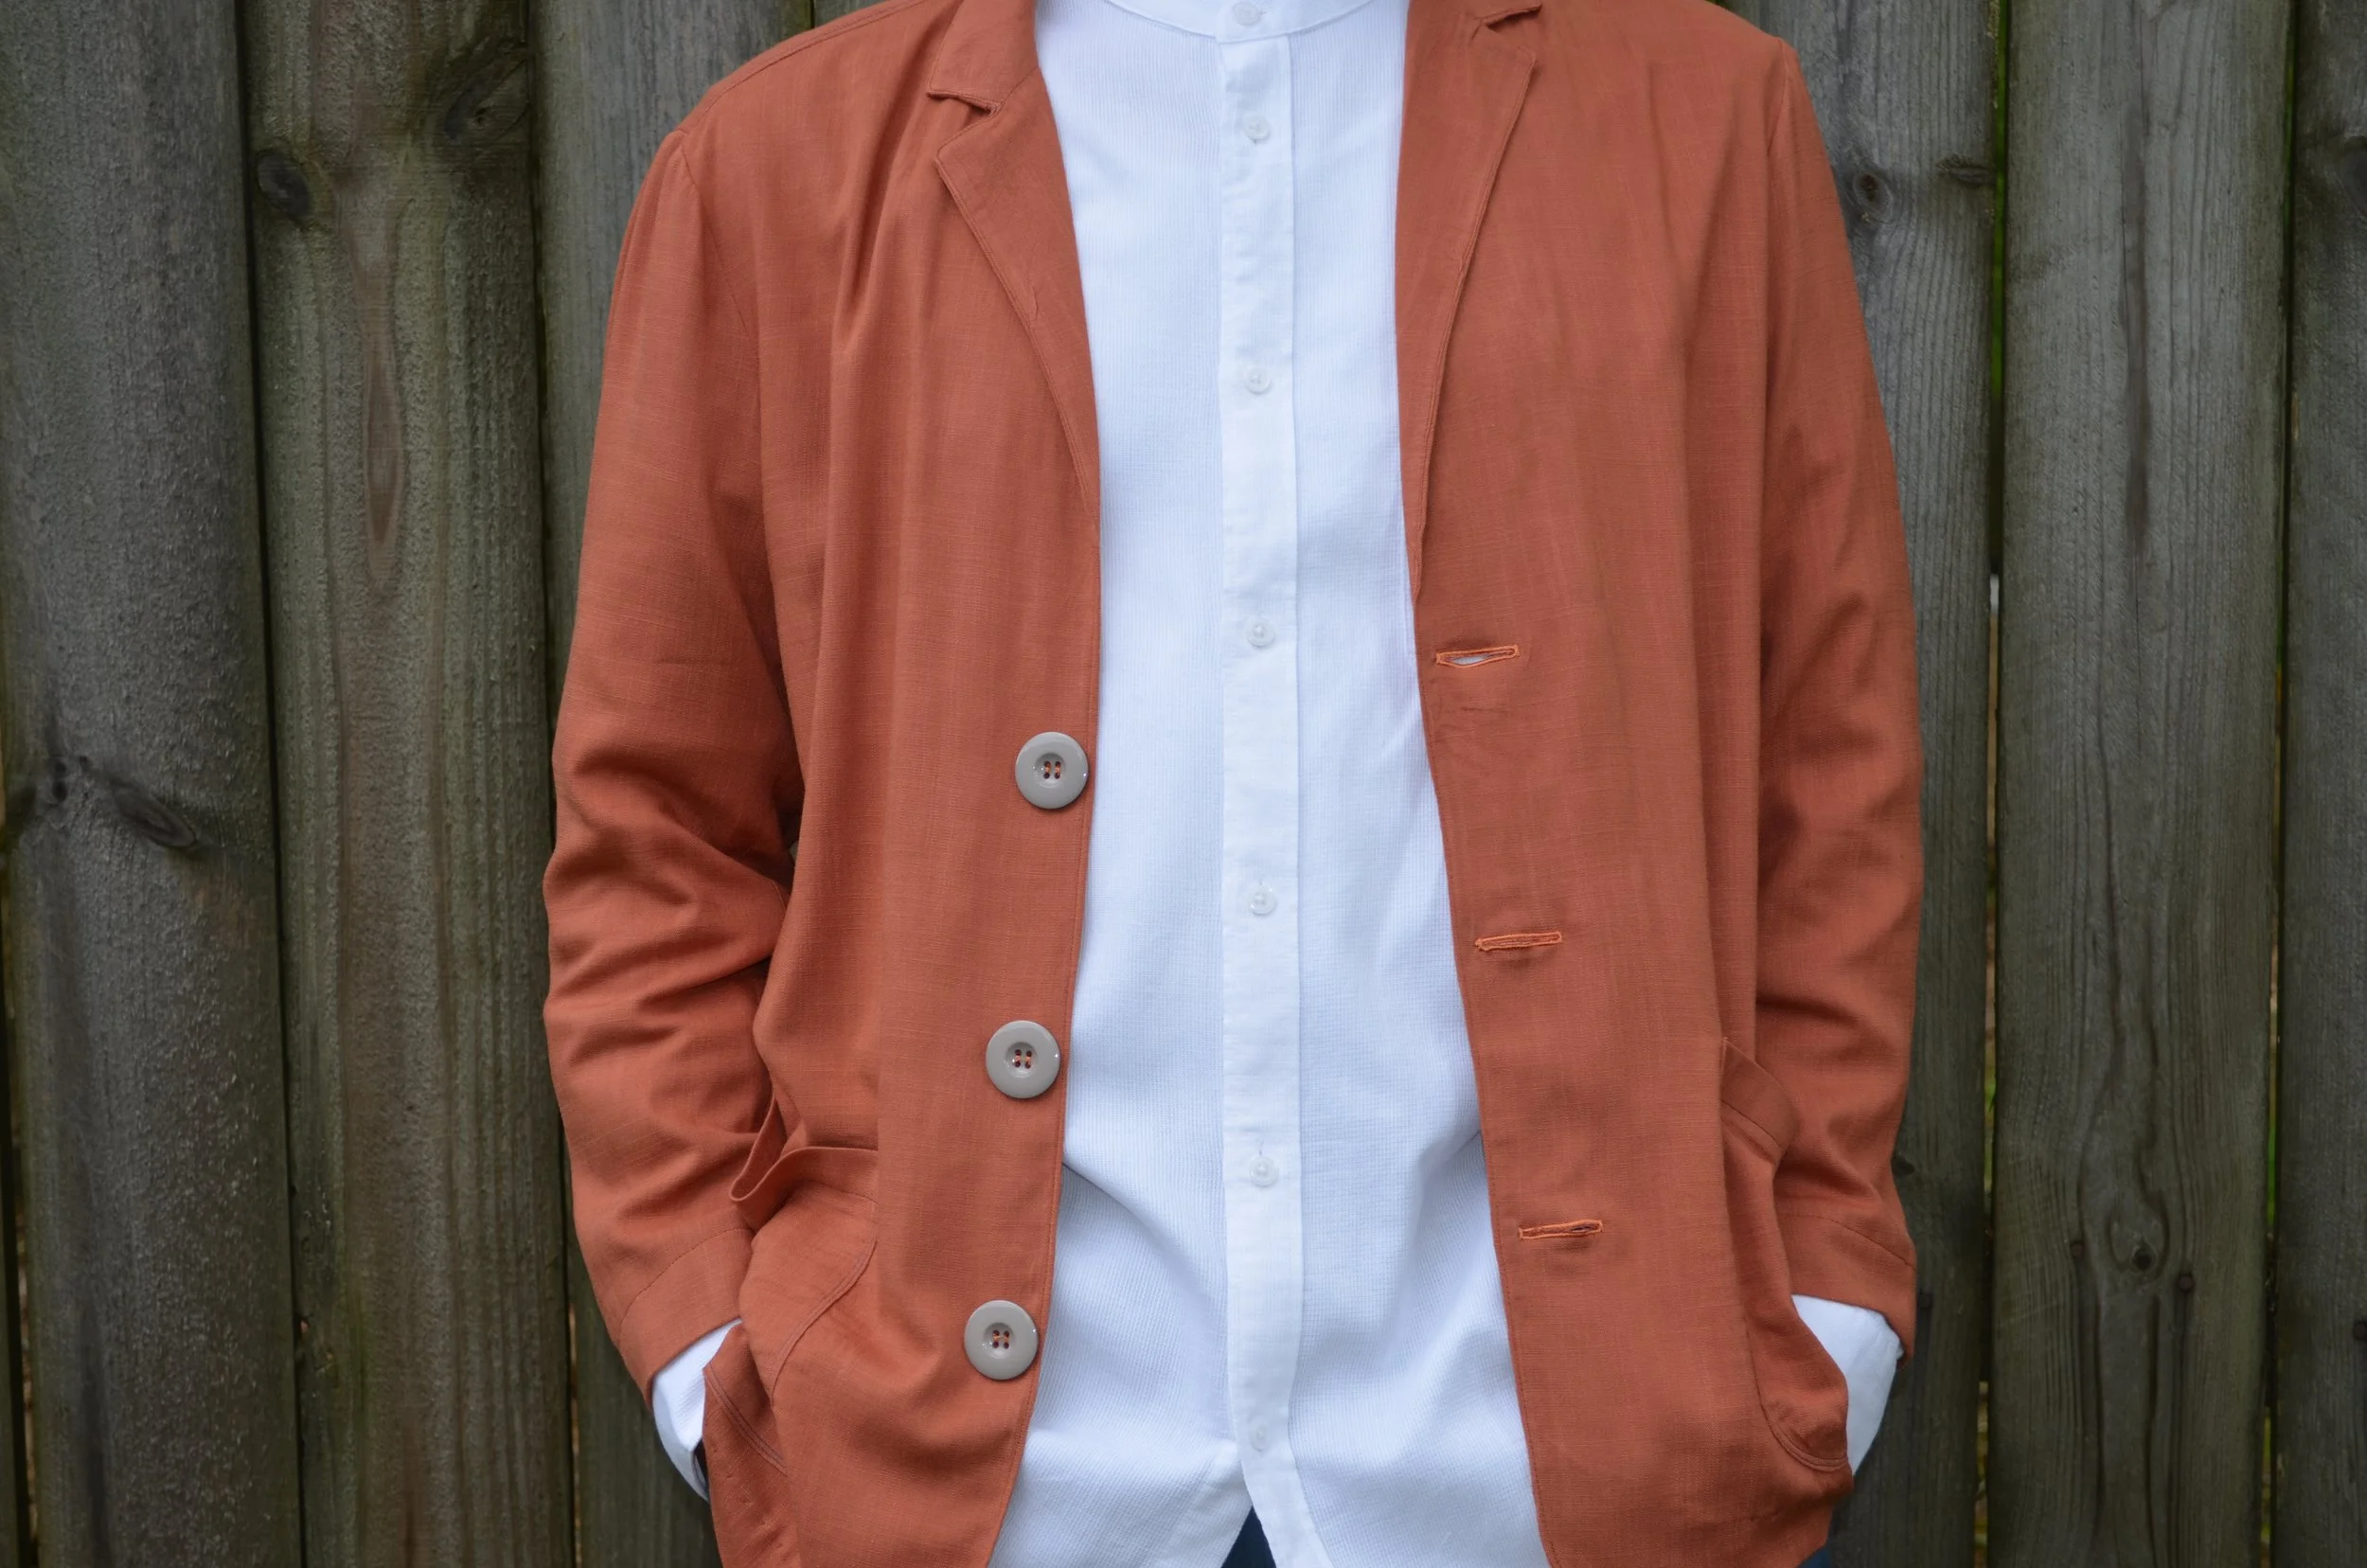
I went to the Internet and searched different types of buttonholes. I was pleasantly surprised to find images of bound, corded, piped, invisible, and many other types of buttonholes. I was also surprised to discover that my buttonhole foot has a hook on the back of it to make corded buttonholes. Corded buttonholes are made by using gimping thread or buttonhole twist thread in which the buttonhole stitches zig zag over to create a corded buttonhole. Corded buttonholes make sturdier buttonholes and can also add a decorative feature to your garment. They can be sewn by hand or on the sewing machine.
The Trial
After watching a video on how to make corded buttonholes with the machine, I immediately had to practice this technique. I didn’t have the suggested gimping thread to practice with so I improvised with embroidery thread and cording. The cording didn’t work as well since it was too thick, so the embroidery thread would have to do. I spent hours (and I mean hours) practicing the corded buttonhole method. My machine comes with two buttonhole feet - a manual buttonhole foot and an automatic buttonhole foot. Both of them have a hook on the back to make corded buttonholes. I practiced with the manual foot first and got some pretty good results. Then I switched to the automatic buttonhole foot. It was easier to make corded buttonholes with this foot because there is a groove in the front to hold the thread (or whatever you use for cording) while the buttonhole stitches. I continued to practice with different types of thread. I used narrow cording, although it gave a luxurious finish to the buttonhole, it was just too thick - you could see the cording peeking underneath the buttonhole thread. I suppose if the cording and the buttonhole thread were the same color, you wouldn’t be able to tell. I also tried embroidery thread. This worked a little better. It gave me the corded buttonhole look but the feel wasn’t as luxurious to me. The embroidery thread is not thick enough to make a raised corded buttonhole; however, the buttonhole does look reinforced and decorative. I also tried using the same thread that was threaded on the machine; however, it didn’t seem to change the look of the corded buttonhole. In the end, I went with the embroidery thread for my corded buttonholes.
The Finished Garment
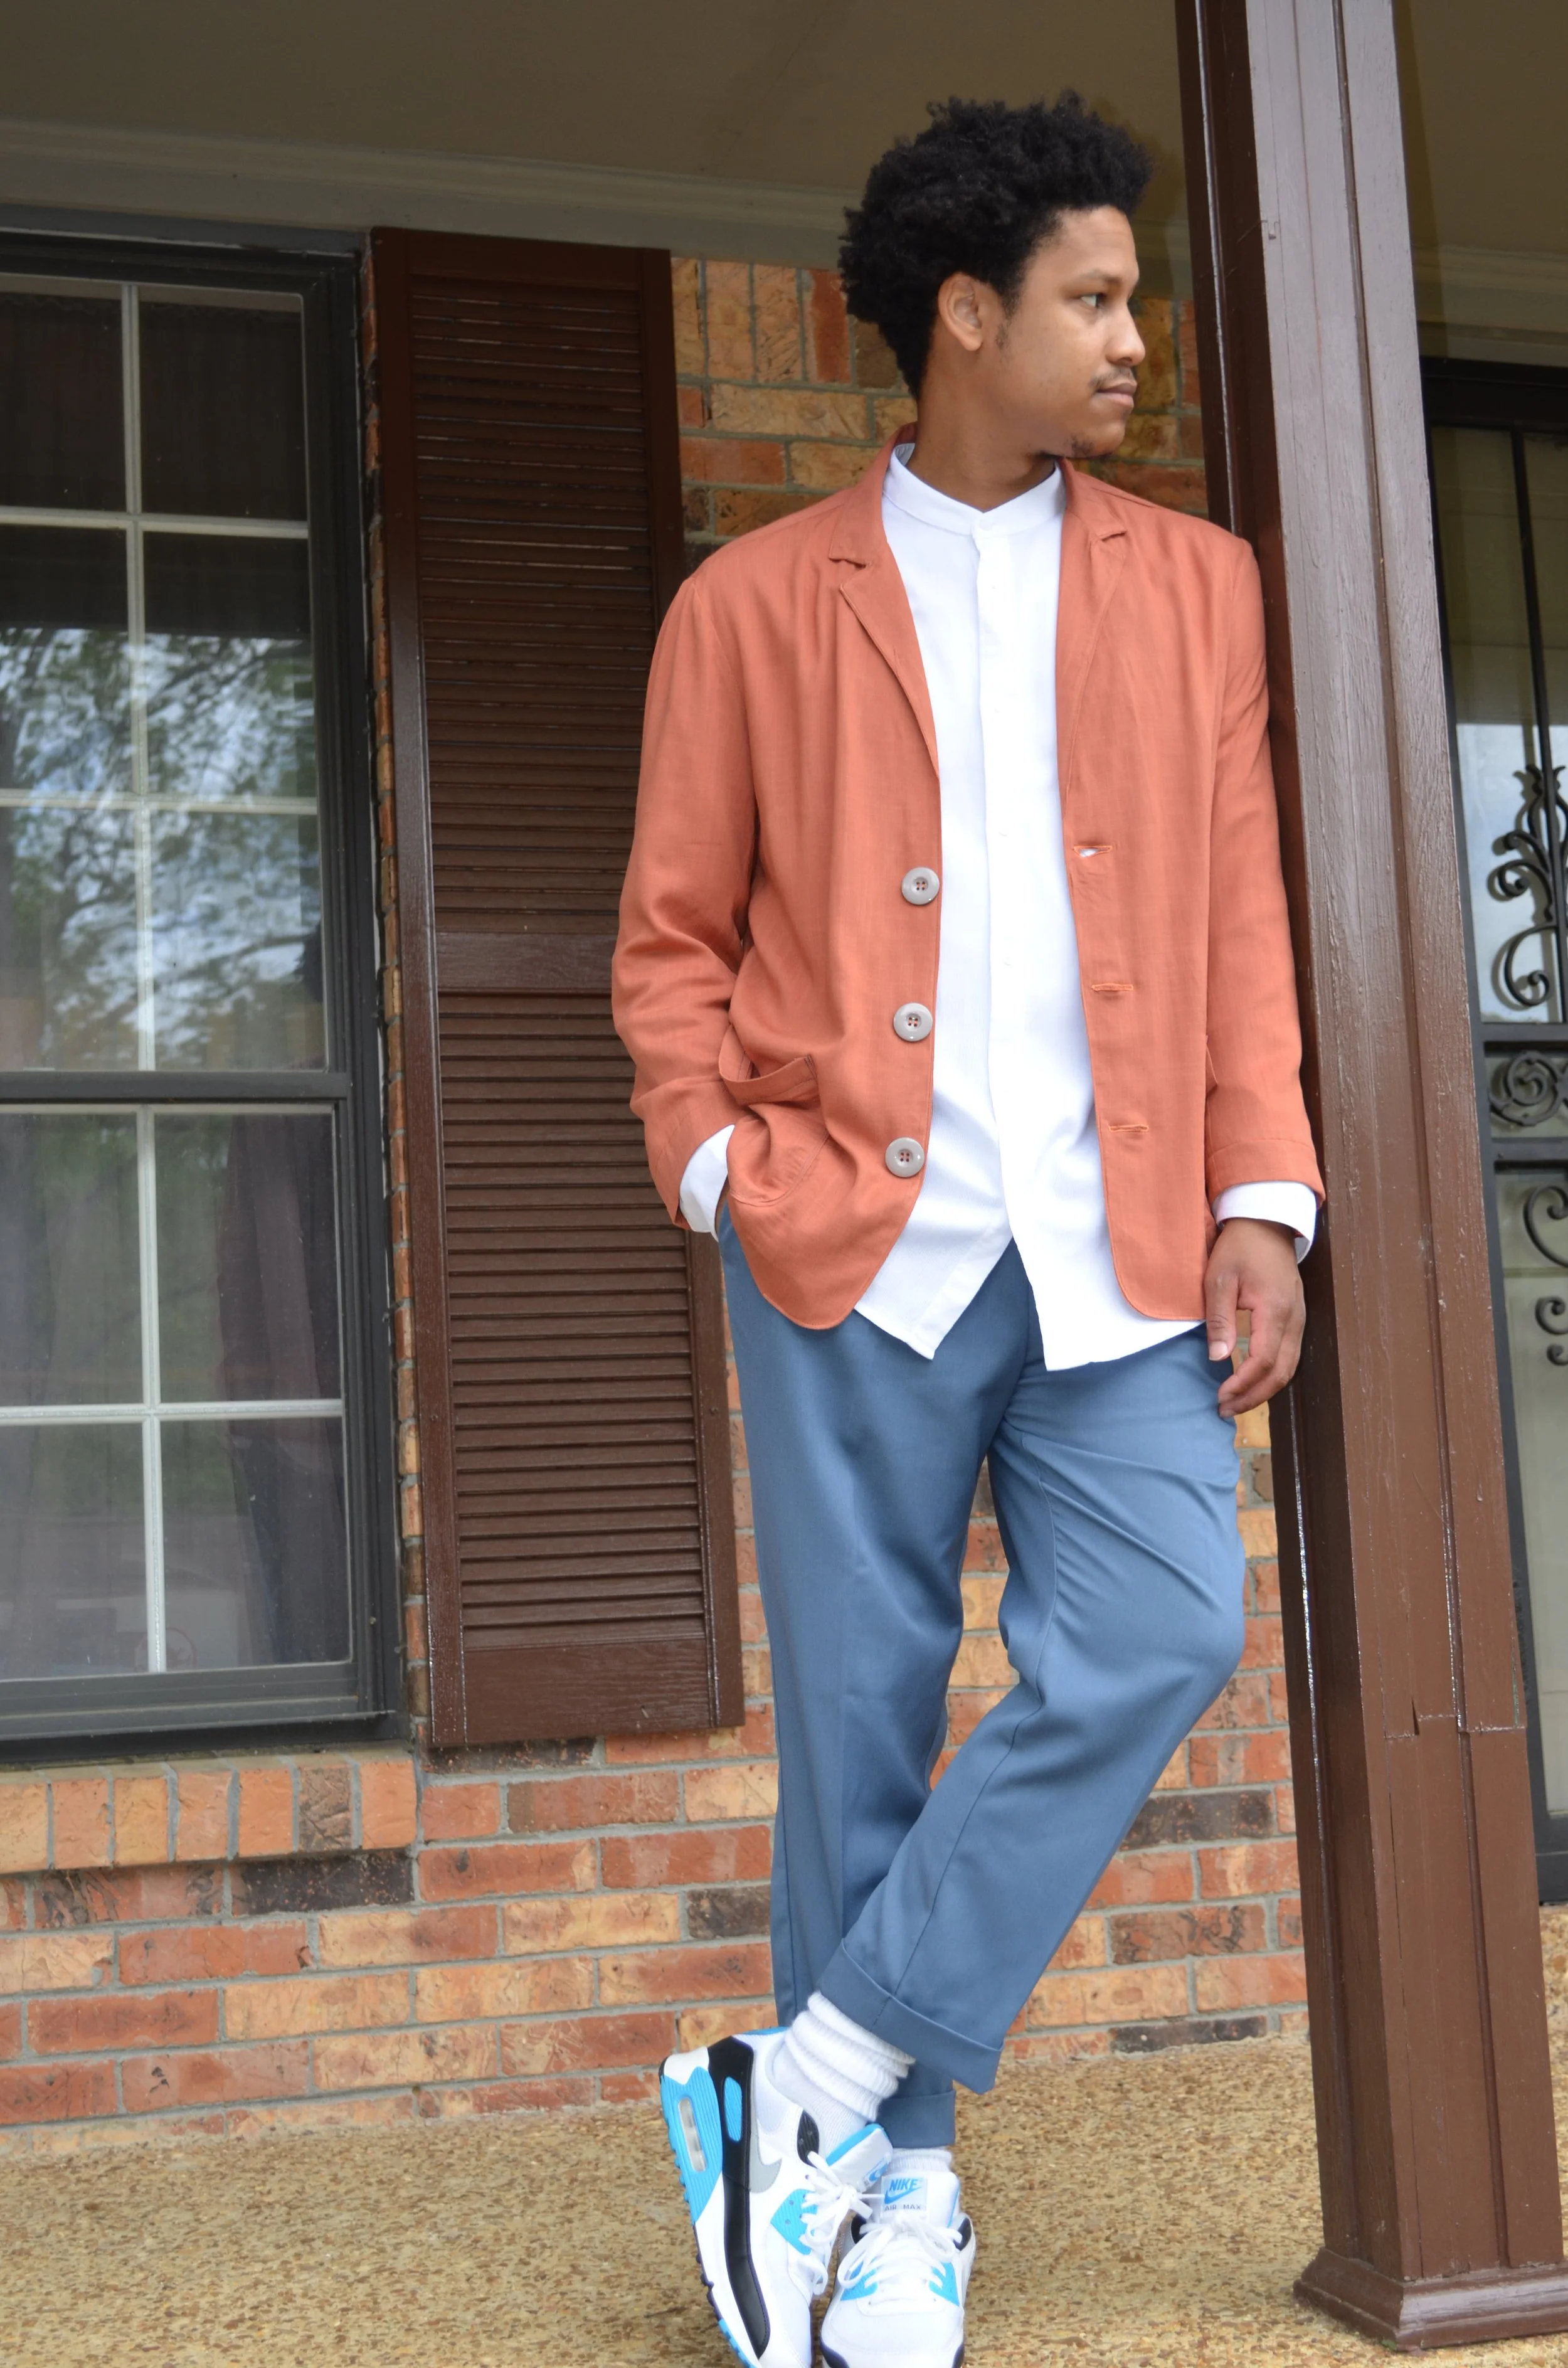
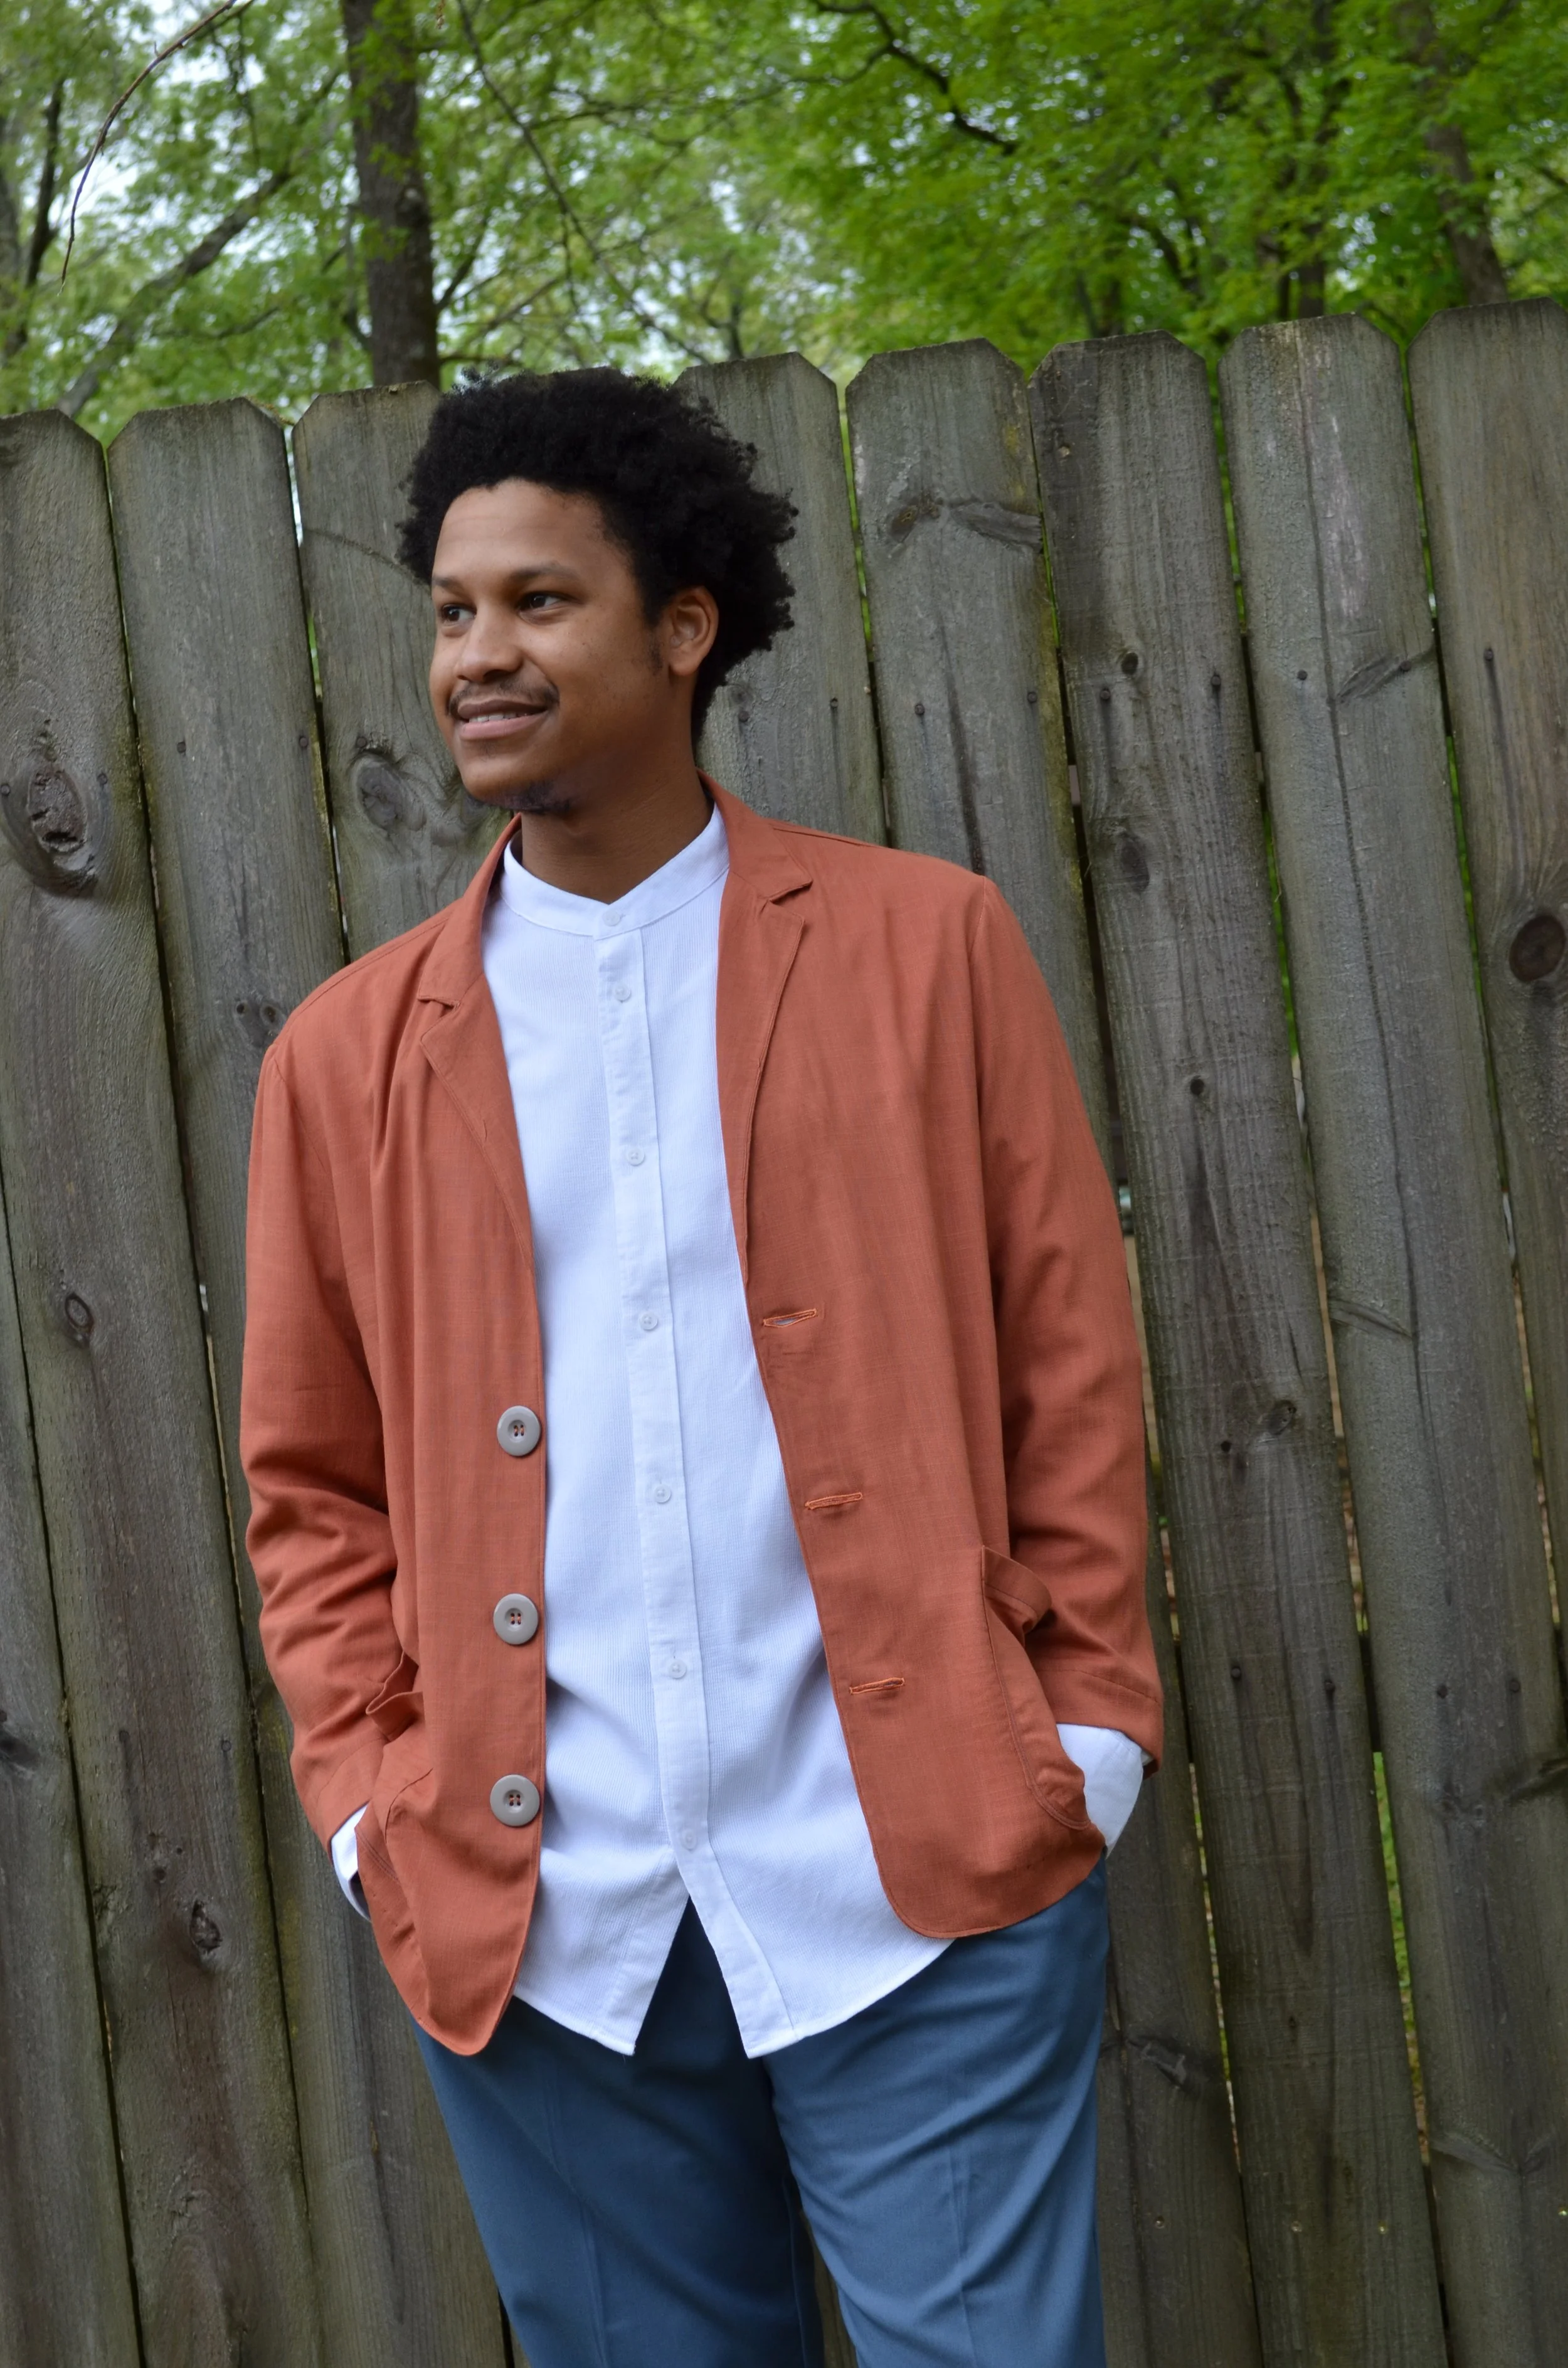
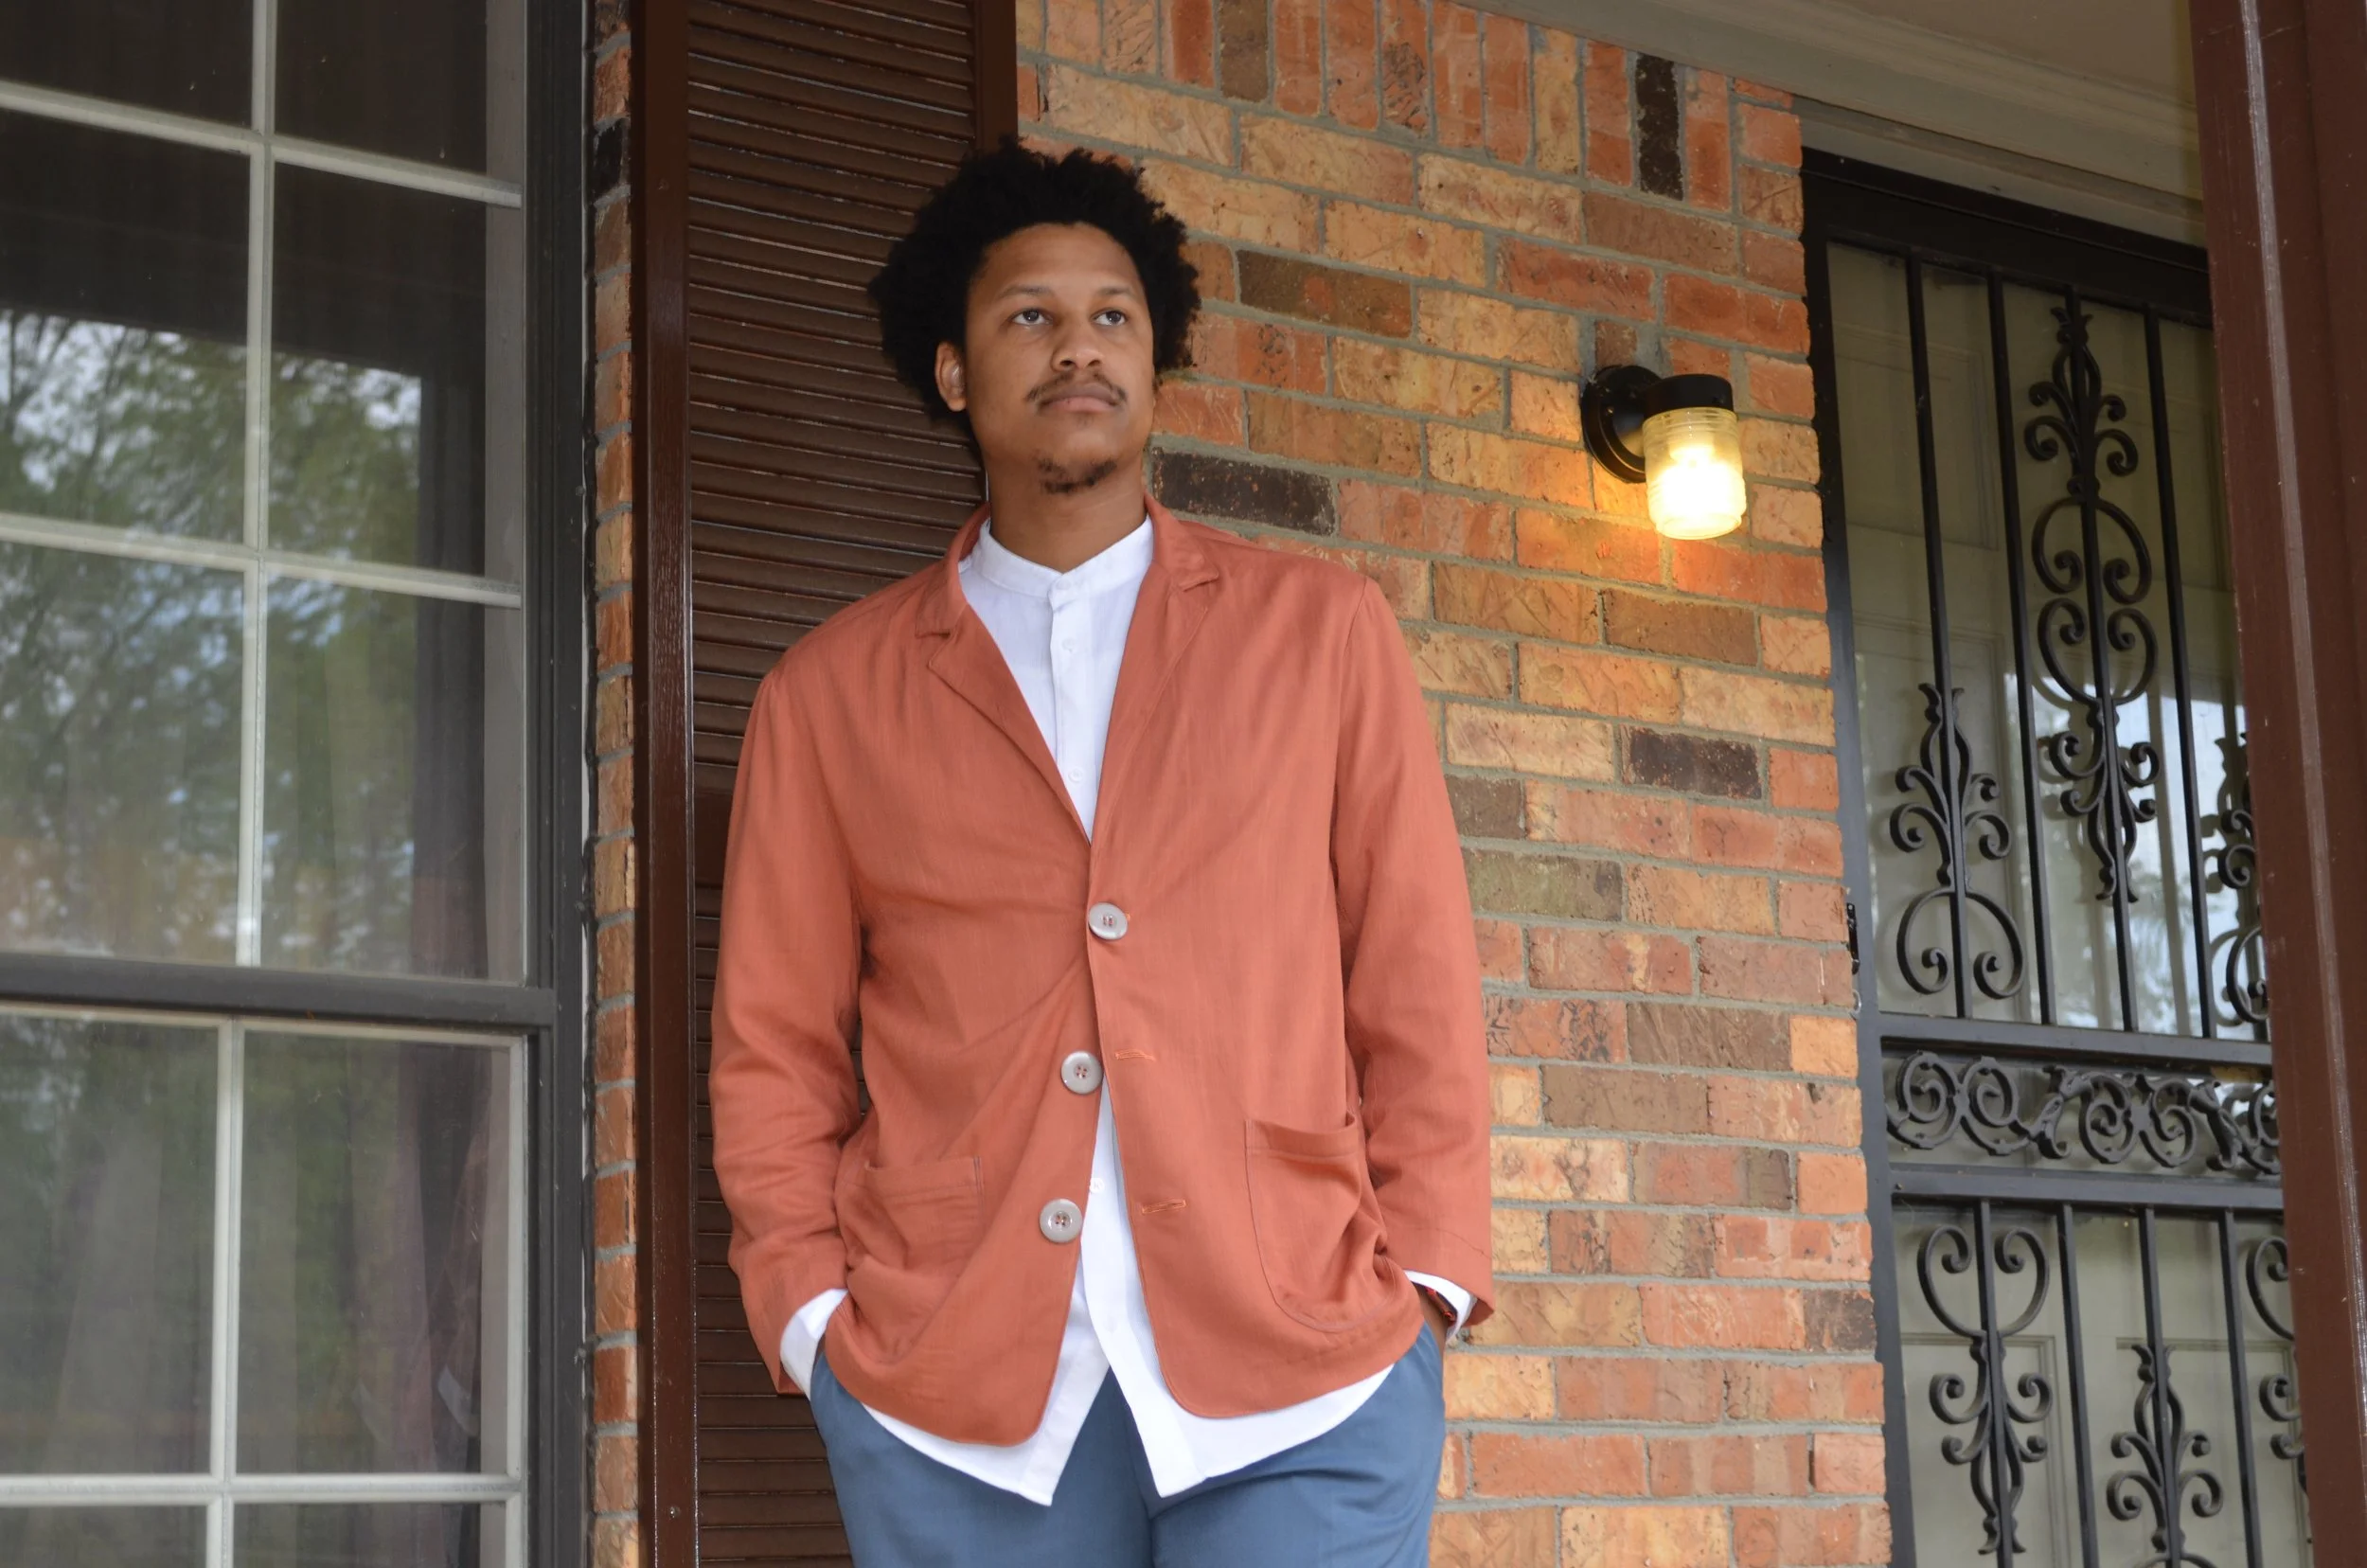
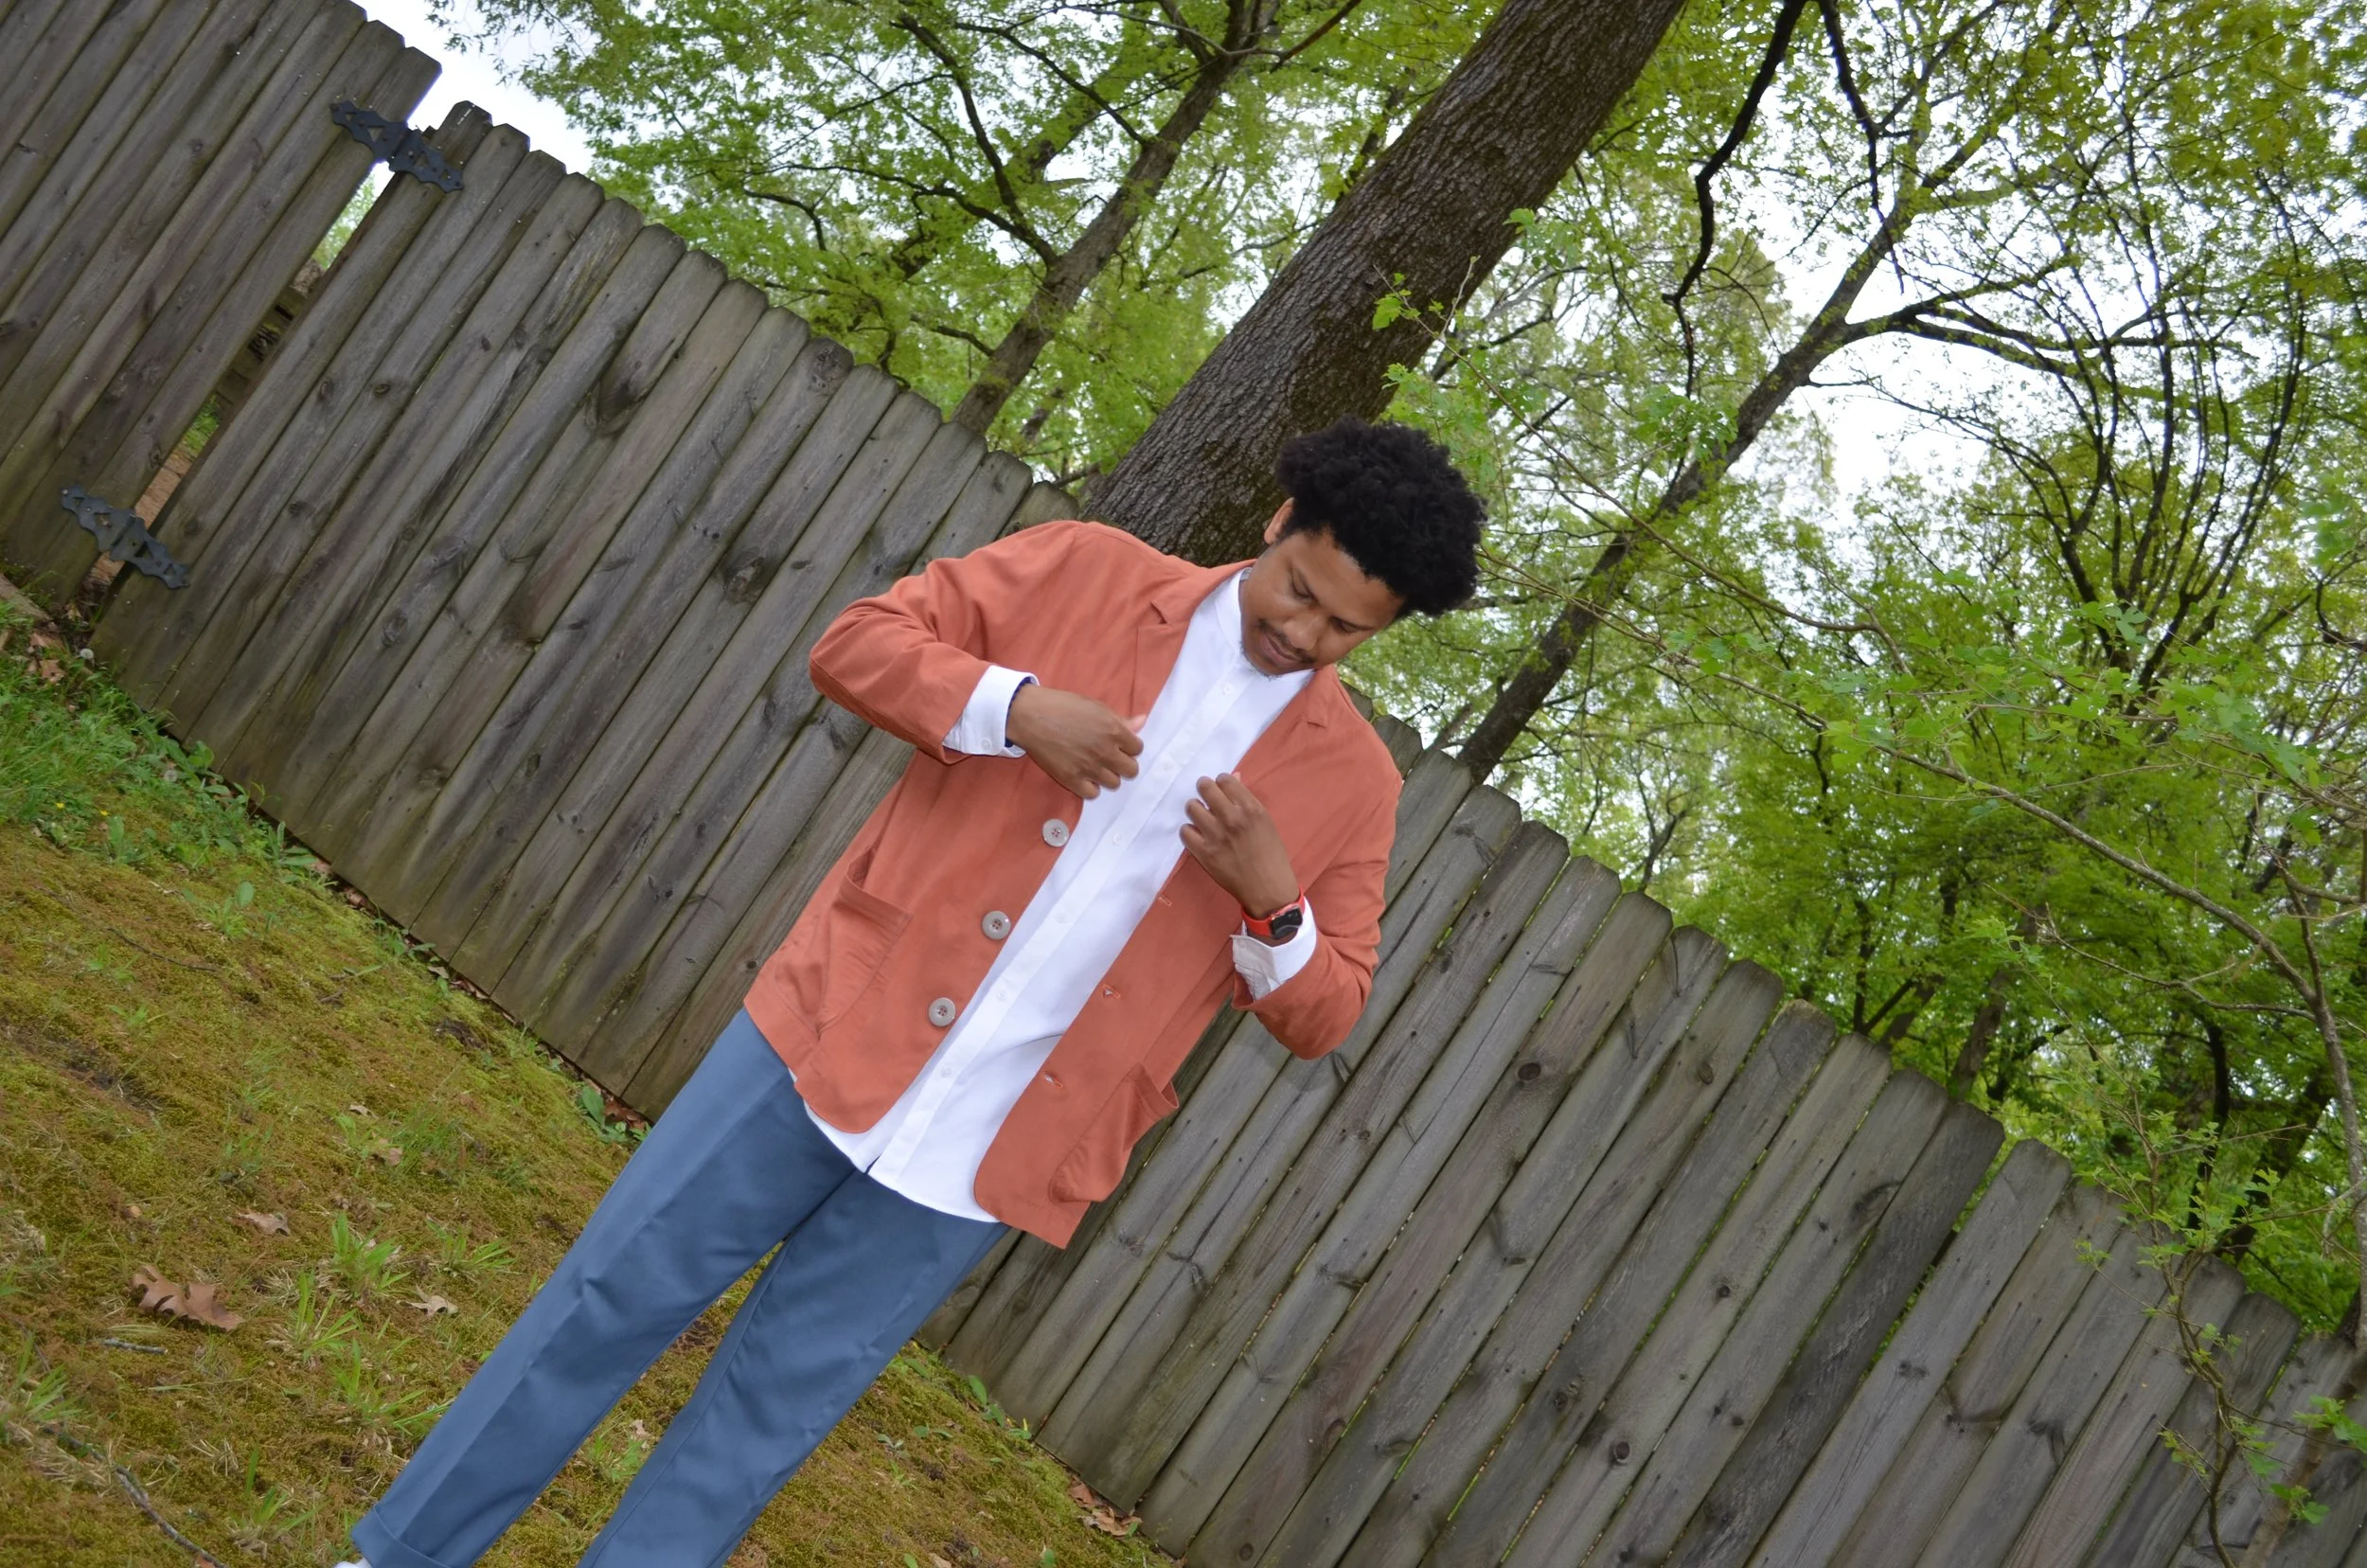
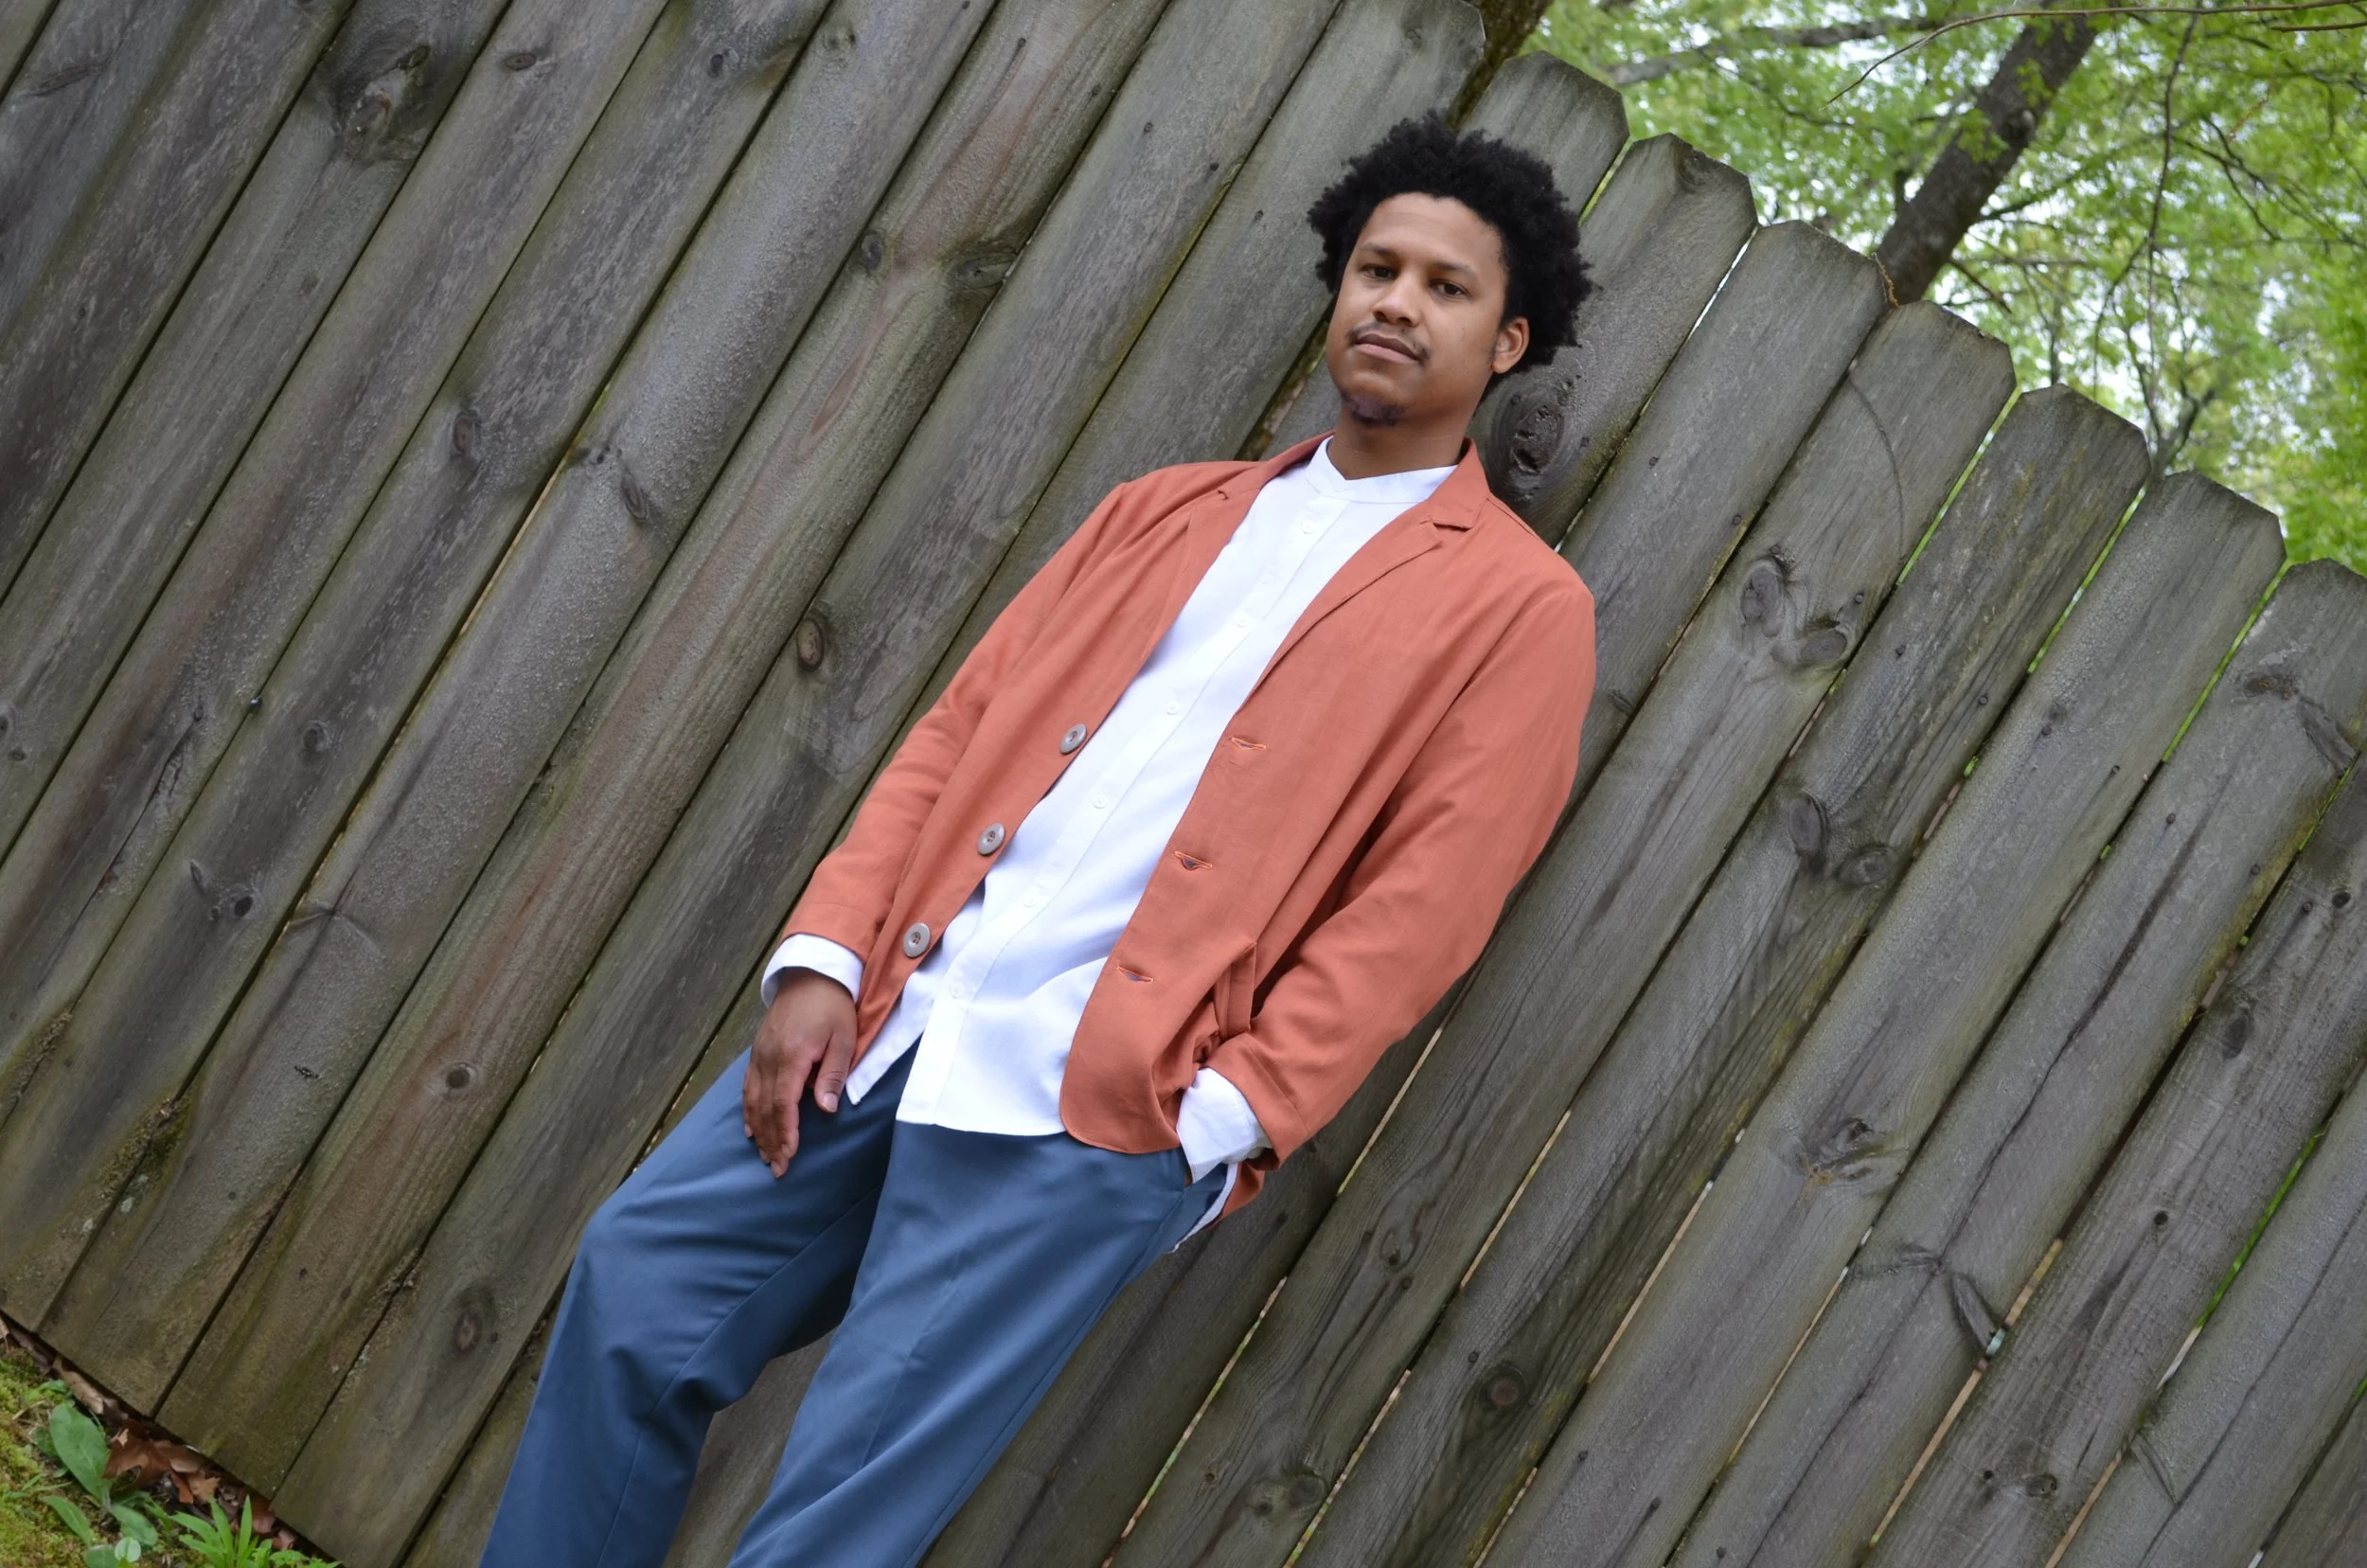
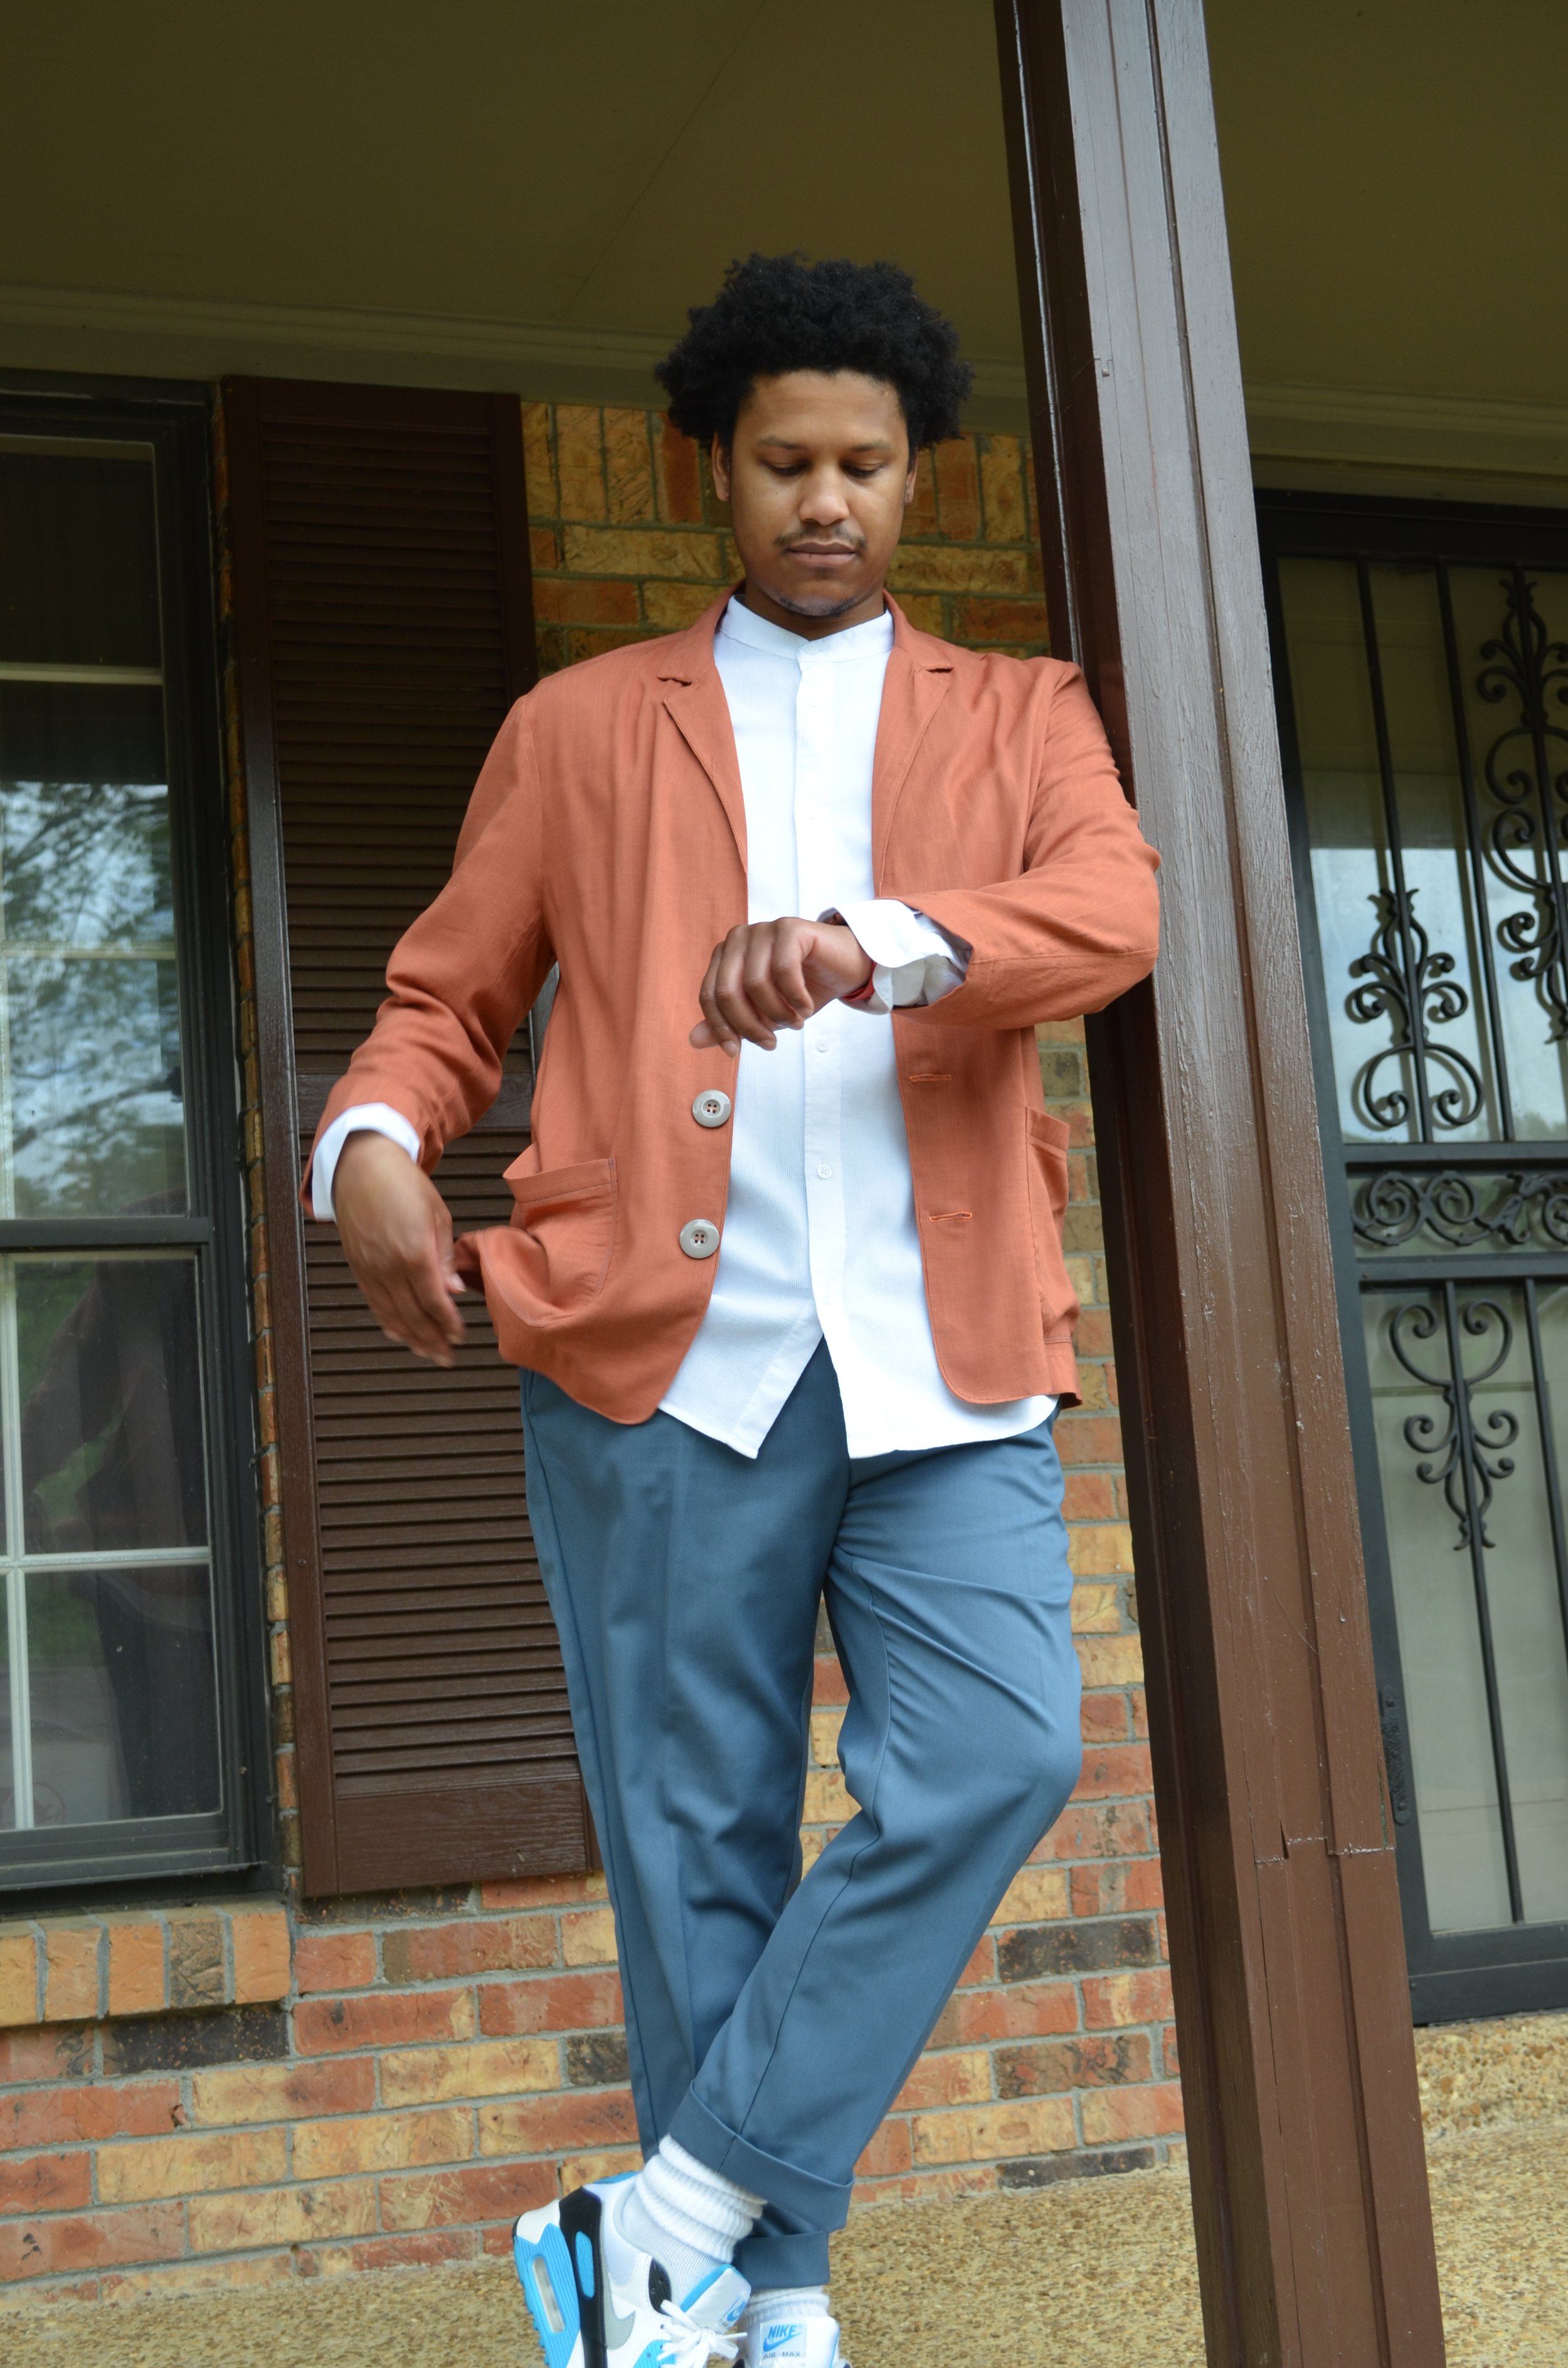
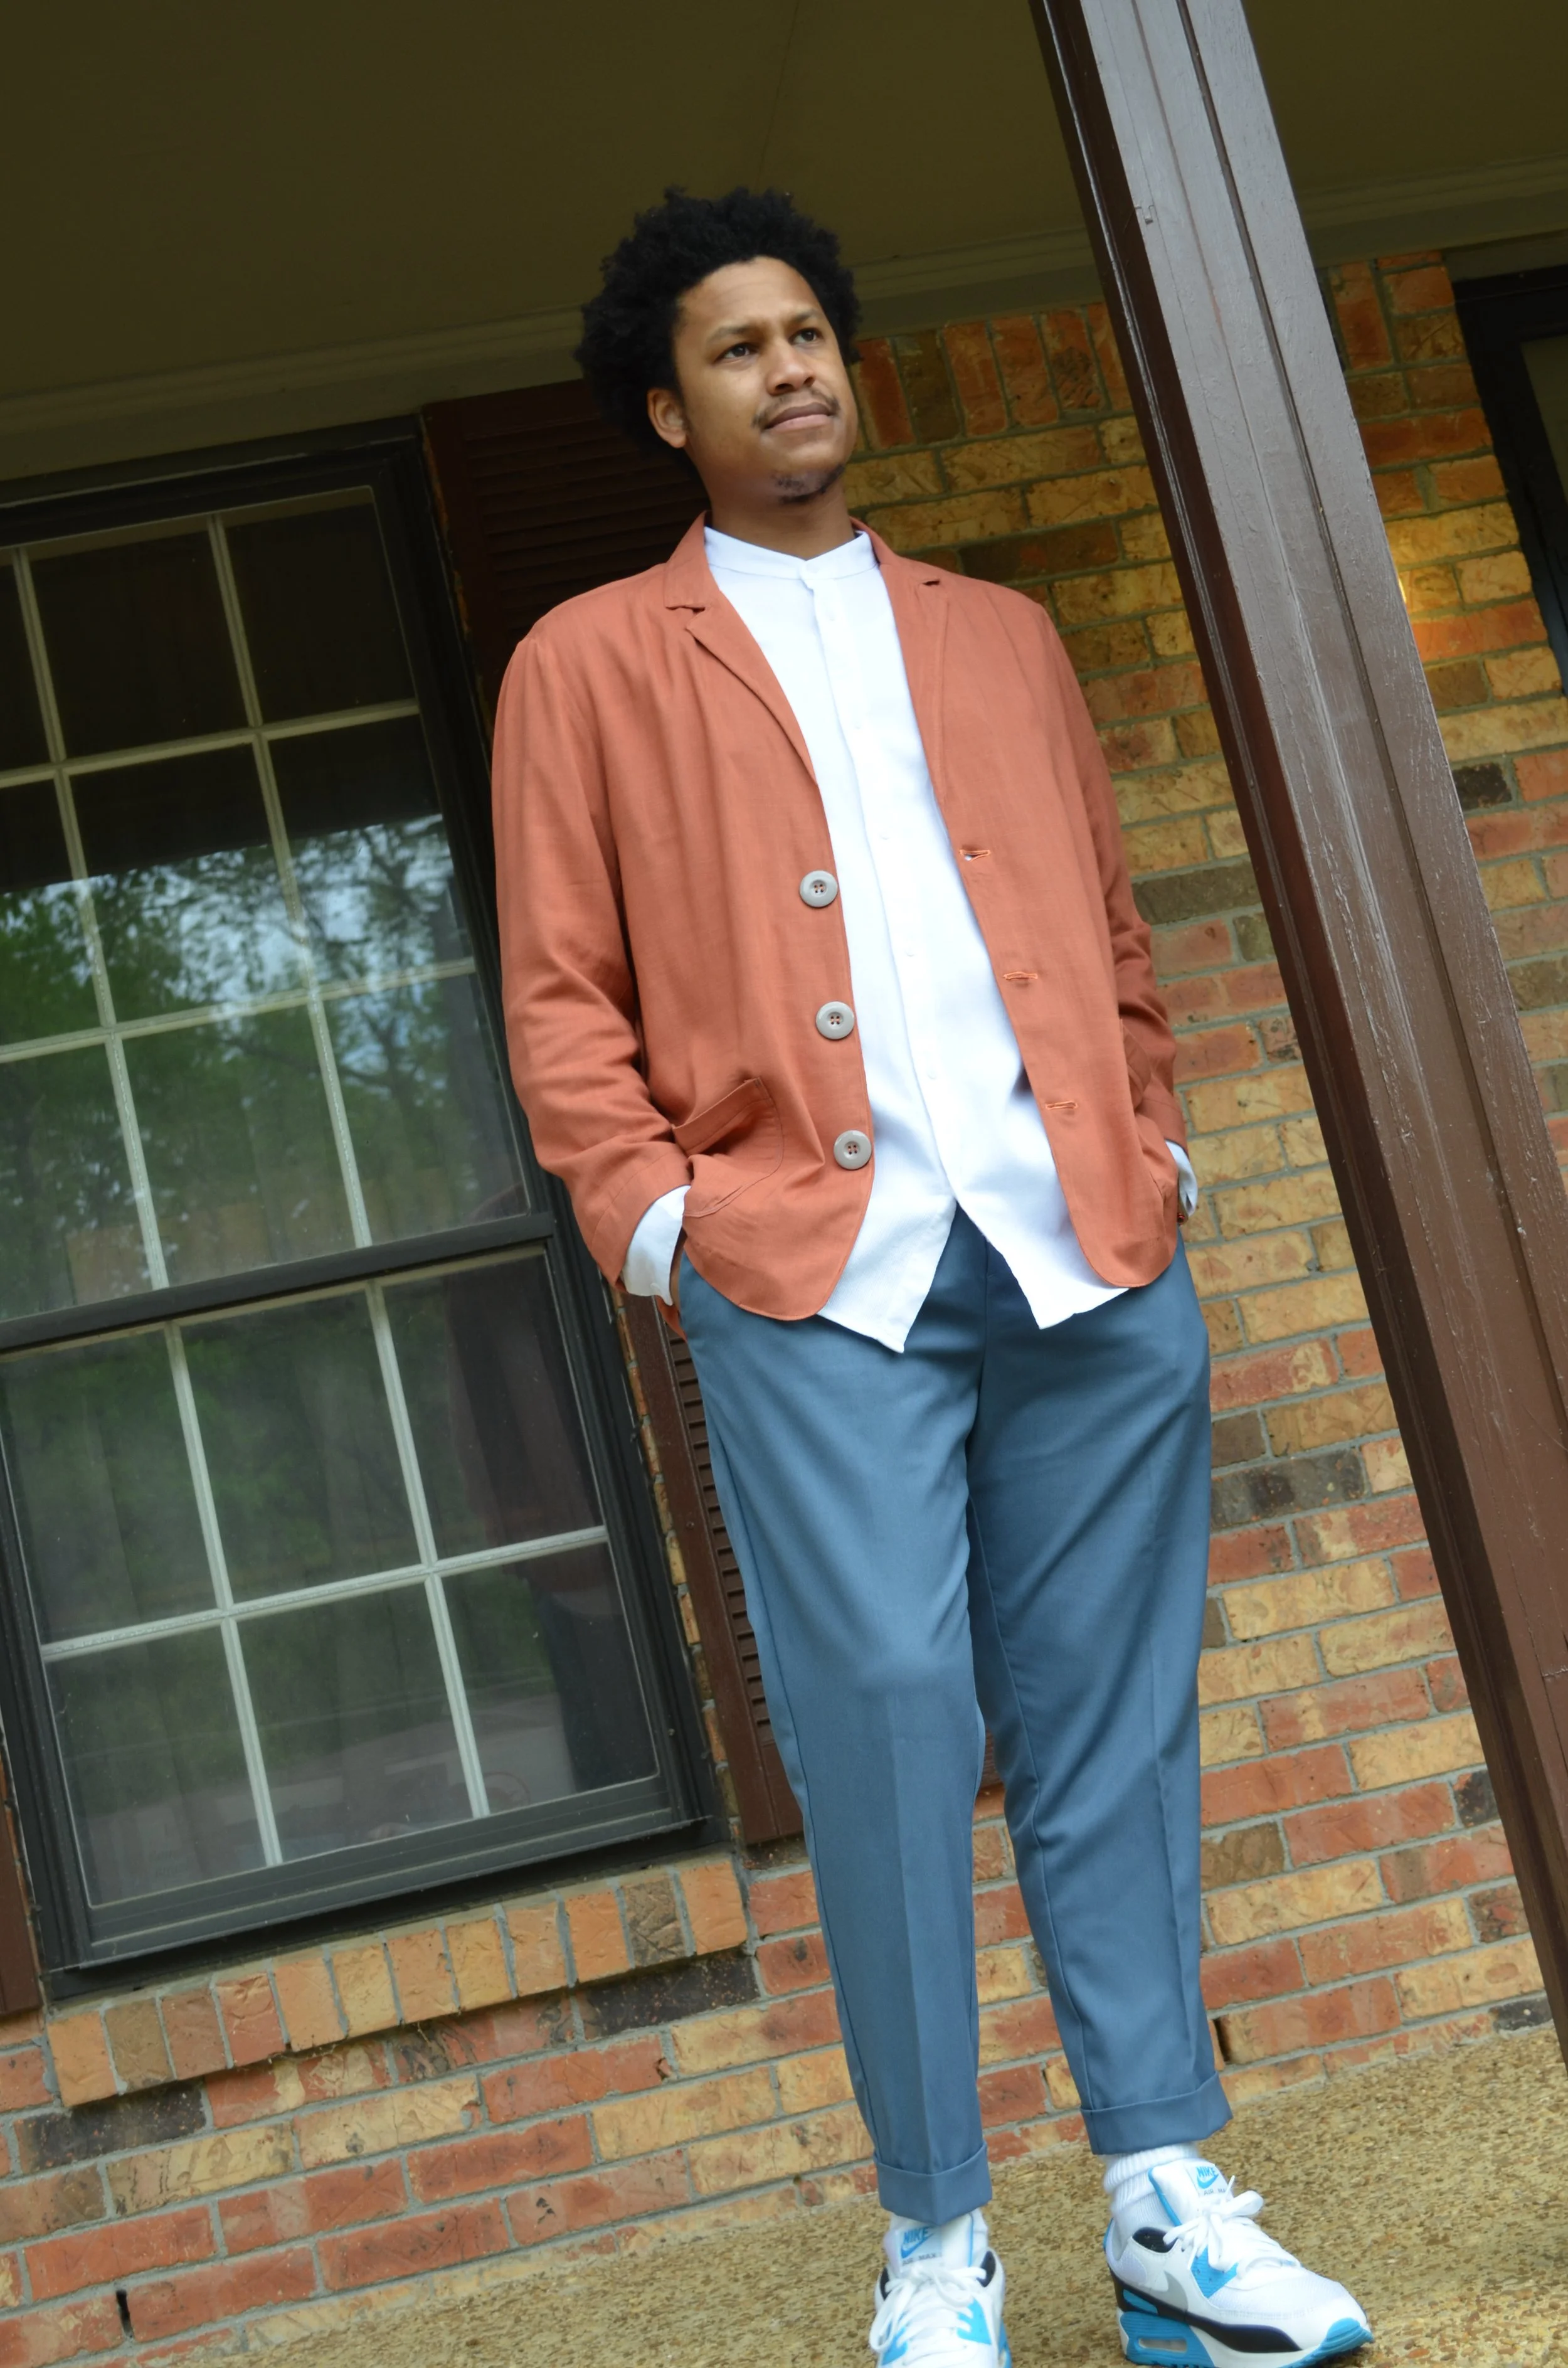
Pattern: I decided to make the Men’s Linen Jacket from the Great British Sewing Bee Sustainable Style Book. I used my 30 year old son as my model again. It’s easy to sew for him because of his size and he loves the items I make for him. I wanted to make something fairly easy so I could concentrate on the buttonholes. There are only three buttonholes in this jacket and no lining. I cut a size 38 which was a perfect fit.
Fabric: I used a Stretch Woven Linen Look Viscose Fabric in Rust from Minerva for this jacket. I used about 3 yards to make this jacket. I’ve used this fabric before to make a dress but this probably wasn’t the best choice for a jacket. This fabric doesn’t hold its shape well enough to be used for a jacket. The finished look wasn’t too bad but I would have liked the fabric to be stiffer. This fabric also made the buttonholes a little flimsy. Fabric choice is important when making a garment and sometimes you think you’re making the right choice until you start sewing. This was one of those moments. I thought this linen fabric would be a great choice for a lightweight summer jacket but it was just a tad too lightweight. However, I was still pleased with the finished look and fit. The finished garment looked like the picture.
Pattern Instructions: The instructions were fairly easy to follow and pretty straightforward. I finished the hem with a blind hem. I did have a little problem with the pockets gaping open because of the lightweight fabric. I will definitely make this pattern again with stiffer fabric. I can’t say there were any dislikes with the pattern. I didn’t make any changes to the pattern other than doing a blind hem.
Buttonholes: Again, I decided to use embroidery thread to make corded buttonholes. After practicing forever, I was finally ready to sew the buttonholes on the jacket. I used the manual buttonhole foot to create the corded buttonholes. Once the buttonhole was sewn, I pulled the excess loop of the embroidery thread down underneath the top bar tack of the buttonhole. Then I used a wide eye needle, threaded it with the remaining embroidery thread to push the thread through to the back of the buttonhole (on the wrong side of the fabric) and underneath the bottom bar tack. I tied a knot on the back and cut off the excess. This created a very clean corded buttonhole.
Overall, this was a great learning experience. I learned a new skill - corded buttonholes - that I plan to use often.